
 Martin Kepplinger
6f3c8ee113
Martin Kepplinger
6f3c8ee113
|
7 years ago | |
|---|---|---|
| .. | ||
| sources | 7 years ago | |
| util | 7 years ago | |
| LICENSE | 7 years ago | |
| LICENSE.microcode | 7 years ago | |
| NEWS | 7 years ago | |
| README.md | 7 years ago | |
| d8ec973fd2.config | 7 years ago | |
| flashrom_rpi_bottom_unlock.sh | 7 years ago | |
| flashrom_rpi_top_write.sh | 7 years ago | |
| front.jpg | 7 years ago | |
| pci8086,0166.rom | 7 years ago | |
| prepare_internal_flashing.sh | 7 years ago | |
| release.sh | 7 years ago | |
| rpi_clip.jpg | 7 years ago | |
README.md
Skulls - Thinkpad X230.
Latest release (config overview and version info)
- Get it from our release page
- The only proprietary binary, the VGA BIOS is executed in "secure" mode (PCI_OPTION_ROM_RUN_YABEL)
coreboot
- We simply take coreboot's current state in it's master branch at the time we build a release image. That's the preferred way to use coreboot. The git revision we use is always included in the release.
Intel microcode
- revision
1ffrom 2018-02-07 see package 20180312 under Intel's license
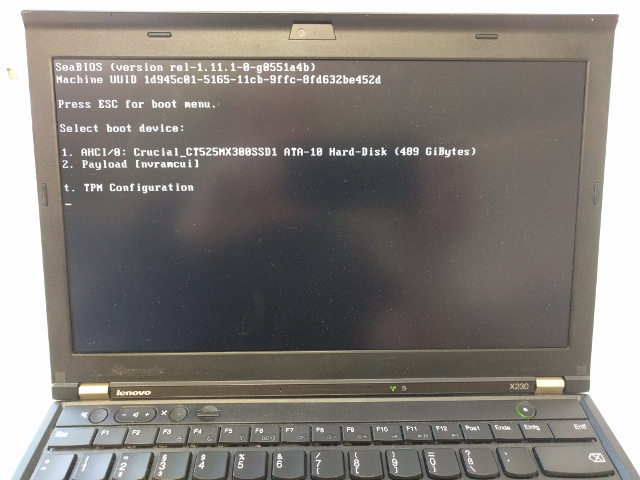
SeaBIOS
- version 1.11.1 from 2018-03-19
table of contents
TL;DR
For first-time flashing, remove the keyboard and palmrest, and (using a
Raspberry Pi with a SPI 8-pin chip clip connected), run
flashrom_rpi_bottom_unlock.sh on the lower chip
and flashrom_rpi_top_write.sh on the top chip of the two.
For updating later, run prepare_internal_flashing.sh. No need to disassemble.
And always use the latest released package. This will be tested. The git master branch is not meant to be stable. Use it for testing only.
Flashing for the first time
- Especially for the first time, you must flash externally. See below for the details for using a Rapberry Pi, for example.
- Make sure you have RAM that uses 1,5V, not 1,35V. Check the specification of your RAM module(s).
original update / EC firmware (optional)
Before flashing coreboot, consider doing one original Lenovo upgrade process in case you're not running the latest version. This is not supported anymore, once you're running coreboot (You'd have to manually flash back your backup images first, see later chapters).
Also, this updates the BIOS and Embedded Controller (EC) firmware. The EC is not updated anymore, when running coreboot. The latest EC version is 1.14 and that's unlikely to change.
In case you're not running the latest BIOS version, either
- use the latest original CD and burn it, or
- use the same, only with a patched EC firmware that allows using any battery:
Disable the battery validation check
By default, only original Lenovo batteries are allowed. Thanks to this project we can use Lenovo's bootable upgrade image, change it and create a bootable USB image, with an EC update that allows us to use any 3rd party aftermarket battery:
sudo apt-get install build-essential git mtools libssl-dev
git clone https://github.com/hamishcoleman/thinkpad-ec && cd thinkpad-ec
make patch_disable_keyboard clean
make patch_enable_battery clean
make patched.x230.img
That's it. You can create a bootable USB stick: sudo dd if=patched.x230.img of=/dev/sdx
and boot from it. Alternatively, burn patched.x230.iso to a CD. And make sure
you have "legacy" boot set, not "UEFI" boot.
required hardware
- An 8 Pin SOIC Clip, for example from Pomona electronics or alternatively hooks, for example from E-Z-Hook
- 6 female jumper wires to connect the clip to a hardware flasher
- a hardware flasher supported by flashrom but we currently only support using a Raspberry Pi
flashrom chip config
We (or our scripts) use flashrom for flashing. Run
flashrom -p <your_hardware> (for example
flashrom -p linux_spi:dev=/dev/spidev0.0,spispeed=128 for the
Raspberry Pi) to let flashrom detect the chip.
It will probably list a few you need to choose from when flashing
(by adding -c <chipname>). Please review the chip model for your device.
In case you are unsure what to specify, here's some examples we find out there:
4MB chip
MX25L3206Eseems to mostly be in use
8MB chip
MX25L6406E/MX25L6408Eis used in this guideMX25L3206E/MX25L3208Eis seen working with various X230 models.EN25QH64is used sometimes
ifd unlock and me_cleaner: the 8MB chip
The Intel Management Engine resides on the 8MB chip (at the bottom, closer to you). We don't need to touch it for coreboot-upgrades in the future, but to enable internal flashing, we need to unlock it once. We run ifdtool and, while we are at it, me_cleaner on it:
We support using a RPi, see below for the connection details. Move the release-tarball to the RPi (USB Stick or however) and unpack it (to the current directory and change into it):
mkdir tarball_extracted
tar -xf <tarball>.tar.xz -C tarball_extracted
cd tarball_extracted
And finally unlock the 8M chip by using the included script (be patient). Again, this doesn't replace much; it reads the original, unlocks and flashes back:
sudo ./flashrom_rpi_bottom_unlock.sh -m -c <chipname> -k <backup.bin>
That's it. Keep the backup safe.
background (just so you know)
-
The
-moption above also runsme_cleaner -Sbefore flashing back. -
The
-loption will (re-)lock your flash ROM, in case you want to force yourself (and others) to hardware-flashing externally. -
If you don't use a RPi, change the flashrom programmer to your needs.This is roughly what's going on:
flashrom -p linux_spi:dev=/dev/spidev0.0,spispeed=128 -c "MX25L6406E/MX25L6408E" -r ifdmegbe.rom
flashrom -p linux_spi:dev=/dev/spidev0.0,spispeed=128 -c "MX25L6406E/MX25L6408E" -r ifdmegbe2.rom
diff ifdmegbe.rom ifdmegbe2.rom
git clone https://github.com/corna/me_cleaner.git && cd me_cleaner
./me_cleaner.py -S -O ifdmegbe_meclean.rom ifdmegbe.rom
ifdtool -u ifdmegbe_meclean.rom
flashrom -p linux_spi:dev=/dev/spidev0.0,spispeed=128 -c "MX25L6406E/MX25L6408E" -w ifdmegbe_meclean.rom.new
BIOS: the 4MB chip
(internally, memory of the two chips is mapped together, the 8MB being the lower part, but we can essientially ignore that). Again, using a RPi is supported here. We assume you have the unpacked release tarball ready, see above. Use the following included script:
sudo ./flashrom_rpi_top_write.sh -i x230_coreboot_seabios_<hash>_top.rom -c <chipname> -k <backup>
That's it. Keep the backup safe.
How to flash
When upgrading to a new release, only the "upper" 4MB chip has to be written and any of the following examples are possible. Otherwise you cannot use "internal" flashing and please read flashing for the first time.
Example: internal
- Only for updating! You have to have your 8MB chip flashed externally using
our
flashrom_rpi_bottom_unlock.shscript (ifdtool -u) before this, once - very convenient: just install flashrom on your X230 but according to the flashrom manpage this is very dangerous!
- Boot Linux with the
iomem=relaxedboot parameter (for example set in /etc/default/grub) - download the latest release tarball (4MB "top" BIOS image is included) and extract it
- run
prepare_internal_flashing.shfor generating all necessary files and instructions
Example: Raspberry Pi 3
Here you'll flash externally, using a "Pomona 5250 8-pin SOIC test clip". You'll find one easily. Remove the 7 screws to remove the keyboard (by pushing it towards the screen before lifting) and the palmrest. You'll find the chips using the photo below. This is how the SPI connection looks on both chips:
    Screen (furthest from you)
             __
      MOSI  5 --|  |-- 4  GND
       CLK  6 --|  |-- 3  N/C
       N/C  7 --|  |-- 2  MISO
       VCC  8 --|__|-- 1  CS

       Edge (closest to you)
We run Raspbian and have the following setup
-
Serial connection using a "USB to Serial" UART Adapter and picocom or minicom (yes, in this case you need a second PC connected to the RPi over UART)
-
in the SD Cards's
/boot/config.txtfileenable_uart=1anddtparam=spi=on -
For flashrom we put
spi_bcm2835andspidevin /etc/modules -
Connect to a wifi or ethernet to
sudo apt-get install flashrom -
connect the Clip to the Raspberry Pi 3 (there are prettier images too:
     Edge of pi (furthest from you)
                 (UART)
   L           GND TX  RX                           CS
   E            |   |   |                           |
   F +---------------------------------------------------------------------------------+
   T |  x   x   x   x   x   x   x   x   x   x   x   x   x   x   x   x   x   x   x   x  |
     |  x   x   x   x   x   x   x   x   x   x   x   x   x   x   x   x   x   x   x   x  |
   E +----------------------------------^---^---^---^-------------------------------^--+
   D                                    |   |   |   |                               |
   G                                   3.3V MOSIMISO|                              GND
   E                                 (VCC)         CLK
     Body of Pi (closest to you)
Now copy our release tarball over to the Rasperry Pi.
One way to copy, is convertig it to ascii using
uuencode (part of Debian's sharutils package) described below. This is a
direct, shady and slow way to transfer a file. Use a USB
Stick or scp instead. :) (but you need even more hardware or a network).
    (convert)
host$ uuencode <tarball> <tarball>.ascii > <tarball>.ascii
    (transfer)
rpi$ cat > <tarball>.ascii
host$ pv <tarball>.ascii > /dev/ttyUSBX
    (wait)
rpi$ (CTRL-D)
    (convert back)
rpi$ uudecode -o <tarball> <tarball>.ascii
    (verify)
host$ sha1sum <tarball>
rpi$ sha1sum <tarball>
Unpack it:
mkdir tarball_extracted
tar -xf <tarball> -C tarball_extracted
cd tarball_extracted

Connect the SPI clip to the "top" chip, and run:
sudo ./flashrom_rpi_top_write.sh -i x230_coreboot_seabios_<hash>_top.rom -c <chipname>
That's it.
background (just so you know)
- Connecting an ethernet cable as a power-source for SPI (instead of the VCC pin) is not necessary (some other flashing how-to guides mention this). Setting a fixed (and low) SPI speed for flashrom offeres the same stability. Our scripts do this for you.
Why does this work?
On the X230, there are 2 physical "BIOS" chips. The "upper" 4MB one holds the actual bios we can generate using coreboot, and the "lower" 8MB one holds the rest that you can modify yourself once, if you like, but strictly speaking, you don't need to touch it at all. What's this "rest"? Mainly a tiny binary used by the Ethernet card and the Intel Management Engine.